Physical computing · Learning aid for children aged 3 to 5
Touch a tag, and the face lights up
An interactive learning aid that teaches young children the parts of the face. Each name tag hides an IR sensor; touch it, and an Arduino lights the matching eye, nose, lip or ear.
Concept, interaction design and prototyping
Arduino UNO, IR sensors and LEDs, built as a working cardboard prototype

AUDIENCE
Children aged 3 to 5
Learning the parts of the face

HARDWARE
Arduino UNO
5 IR sensors and LEDs

BUILD
Cardboard prototype
Working circuit on a breadboard

SOFTWARE
Arduino IDE
Sensor input to LED output
The brief
Making anatomy something a small child can play with
DESIGN BRIEF
Design an interactive learning aid for children aged 3 to 5 to learn human anatomy in an engaging way.
Built on Arduino UNO, with physical sensors interfaced to the system, so learning happens through touch, light and play.
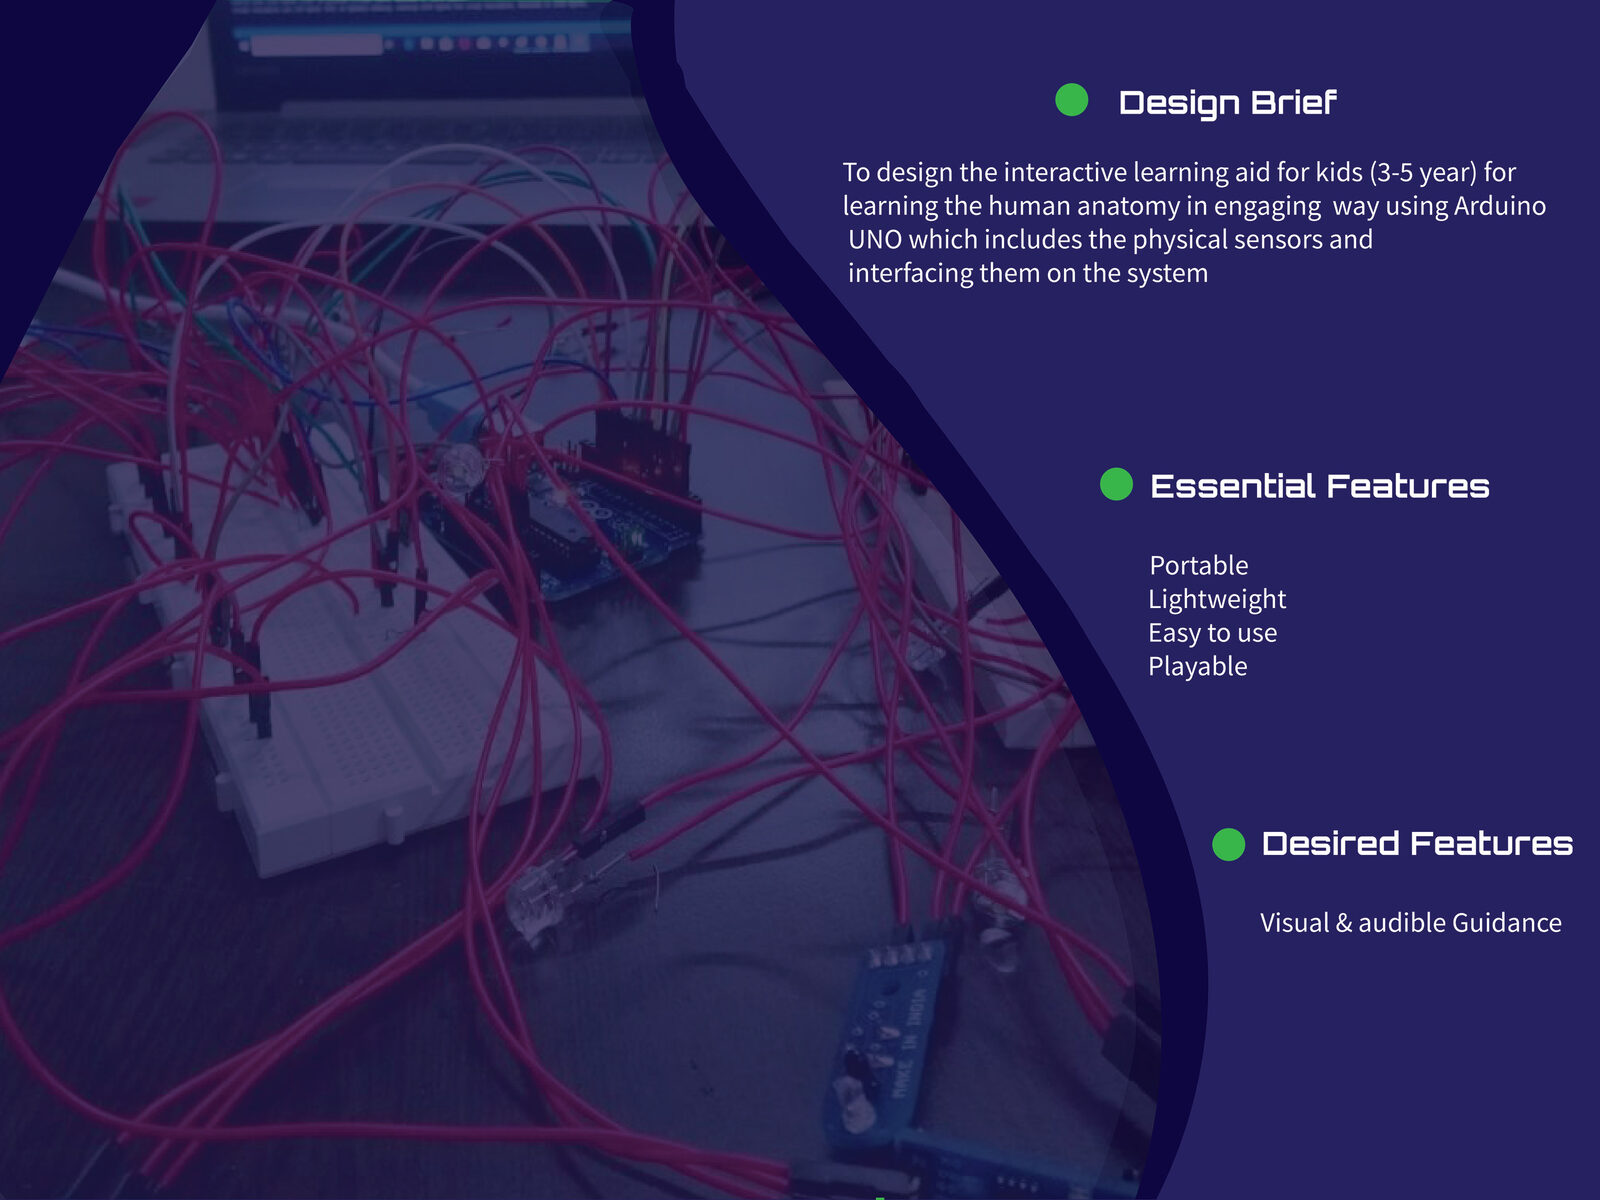
ESSENTIAL
PortableLightweightEasy to usePlayableDESIRED
Visual and audible guidanceHow it works
A sensor under every name tag
Each IR sensor senses a touch or surface from a set distance. The Arduino UNO reads it and blinks the LED on the matching part of the face.
01
Touch a tag
The child places a fingertip on a tag such as Eye, Nose, Lip or Ear.
02
The sensor detects it
An IR sensor under the tag senses the finger from a set distance.
03
Arduino reads the signal
The sensor’s digital pin reports the touch to the Arduino UNO.
04
The part lights up
The LED on that part of the face blinks, linking the word to the place.
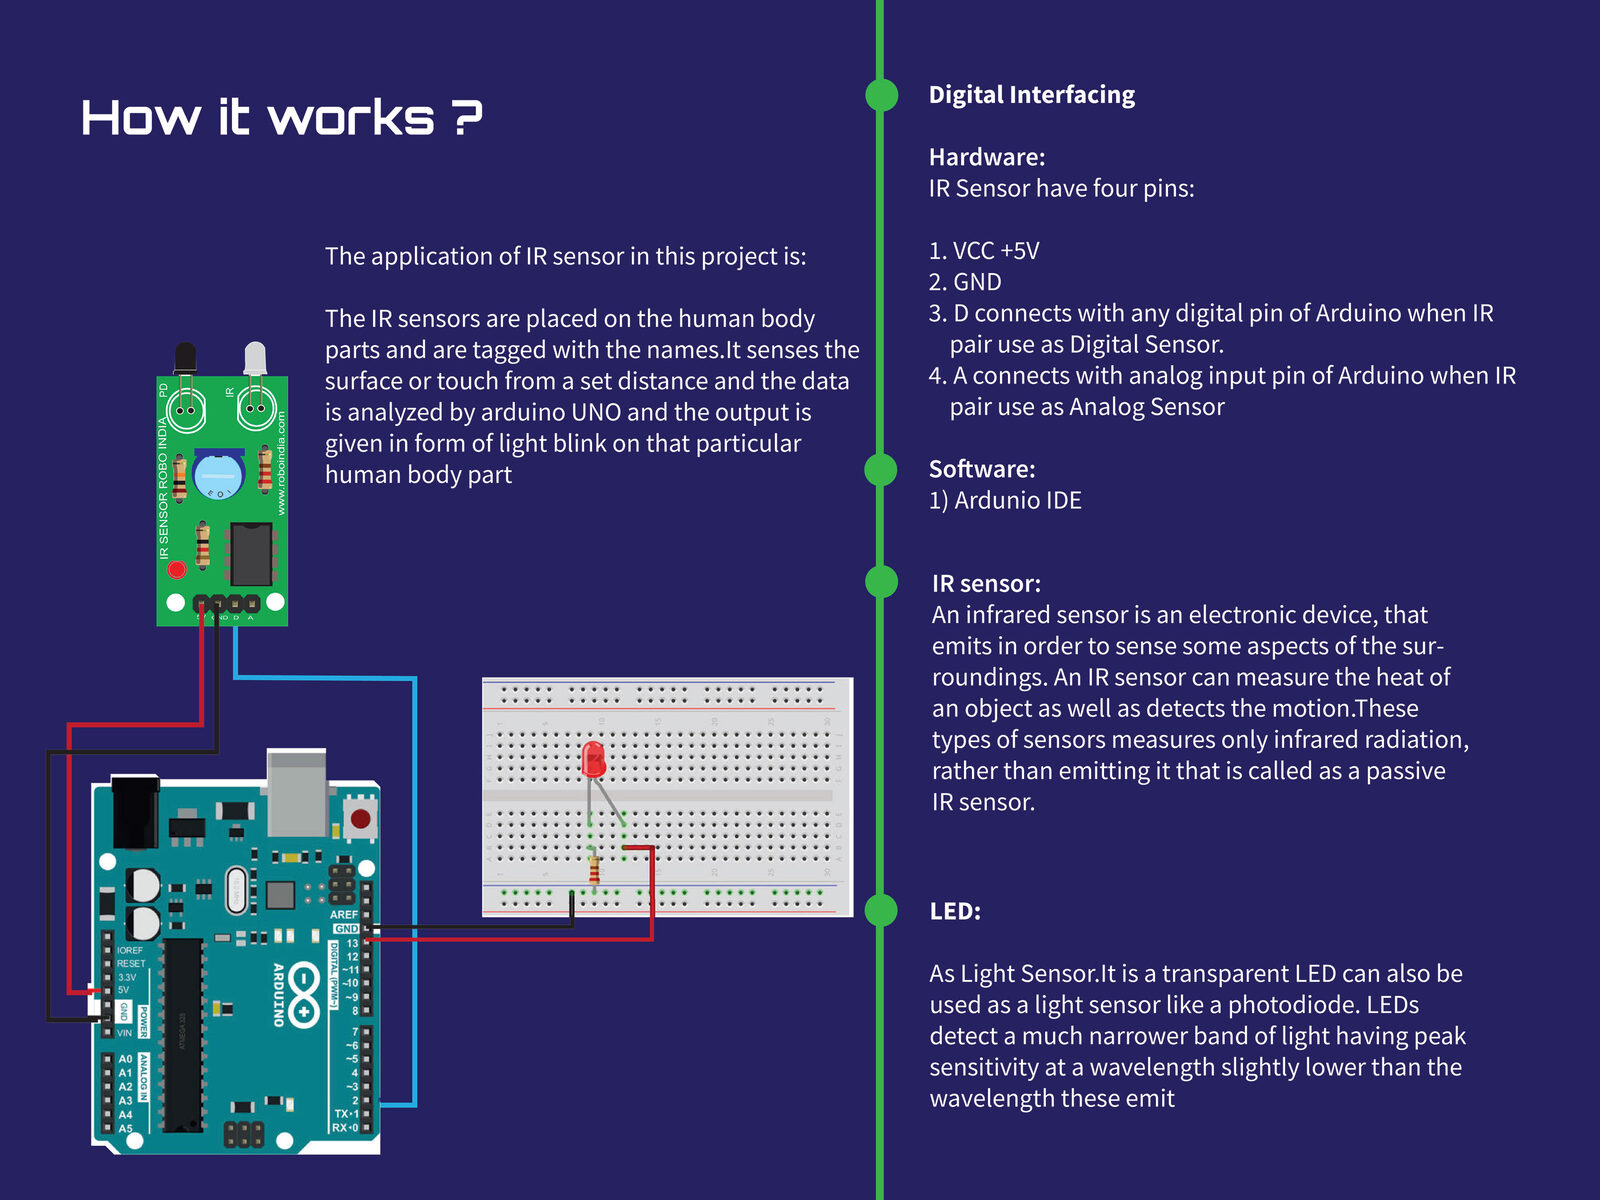
IR sensor
Four pins: VCC +5V, GND, D to a digital pin when used as a digital sensor, and A to an analog input when used as an analog sensor.
LED
The output on each part of the face. A transparent LED can also work as a light sensor, like a photodiode.
Arduino IDE
The software used to program how each sensor input maps to its LED.
Working prototype
Cardboard, five sensors and a face that answers back
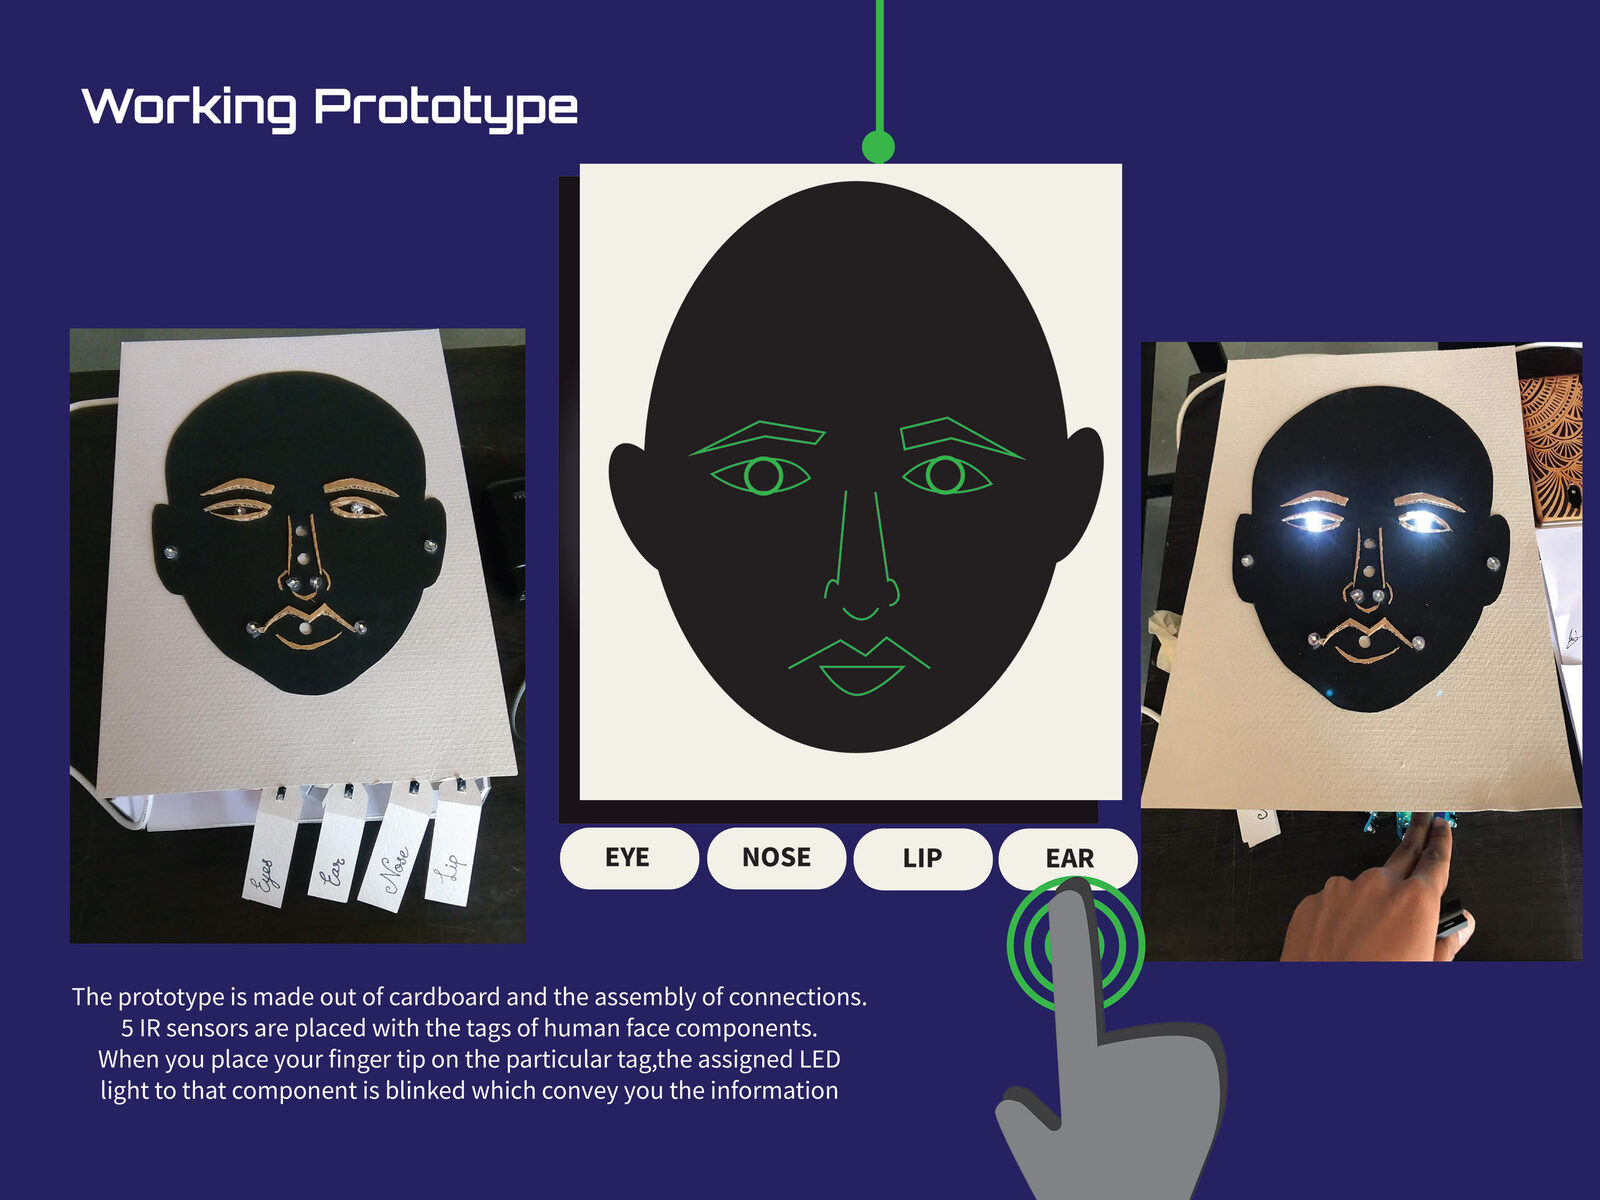
I built the prototype from cardboard and the assembled circuit, with tags for each part of the face hanging below it.
BUILD
Cardboard and wiring
The face is cut from cardboard, with the circuit assembled behind it.
INPUT
Five IR sensors
Each sits with a tag naming a part of the face.
OUTPUT
A light on the right part
Touch a tag and the LED on that part blinks, conveying the information.
Interactive learning aid built with Arduino UNO and IR sensors. This page shows my role and contributions.
MORE PROJECTS
All work